Documentation
Getting Started
If you just want to try out homeAnalytics, run the Docker Compose script with the following command to get it running:
docker-compose -f docker-compose.yml upThis will build 2 containers, 1 for the web UI and one for the data collection tasks. The SQLite database will be created using the path defined in the /.env file for the variable HA_DB_URL.
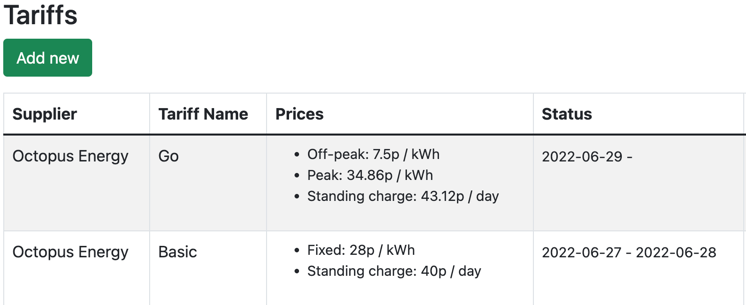
When the containers are up and running, navigate to http://localhost:3000/admin/list-tariffs and add in the details of your Electricity tariff. For your current tariff, leave the end date blank, for example:

Consumption Data
There are two options for setting up consumption data:
- n3rgy - slightly tricky to set-up, but will work for anyone who has a SMETS2 Smart Meter, regardless of your electricity supplier. It also has the advantage of in-day consumption data, with only a few hours data delay.
- Octopus Energy - easier to set-up, however data is only available up to midnight the previous day.
Setting up n3rgy
Find your MPxN number (a 13 digit number, should be on your electricity bill) and note it down. If you need help finding it, UK Power Networks can help.
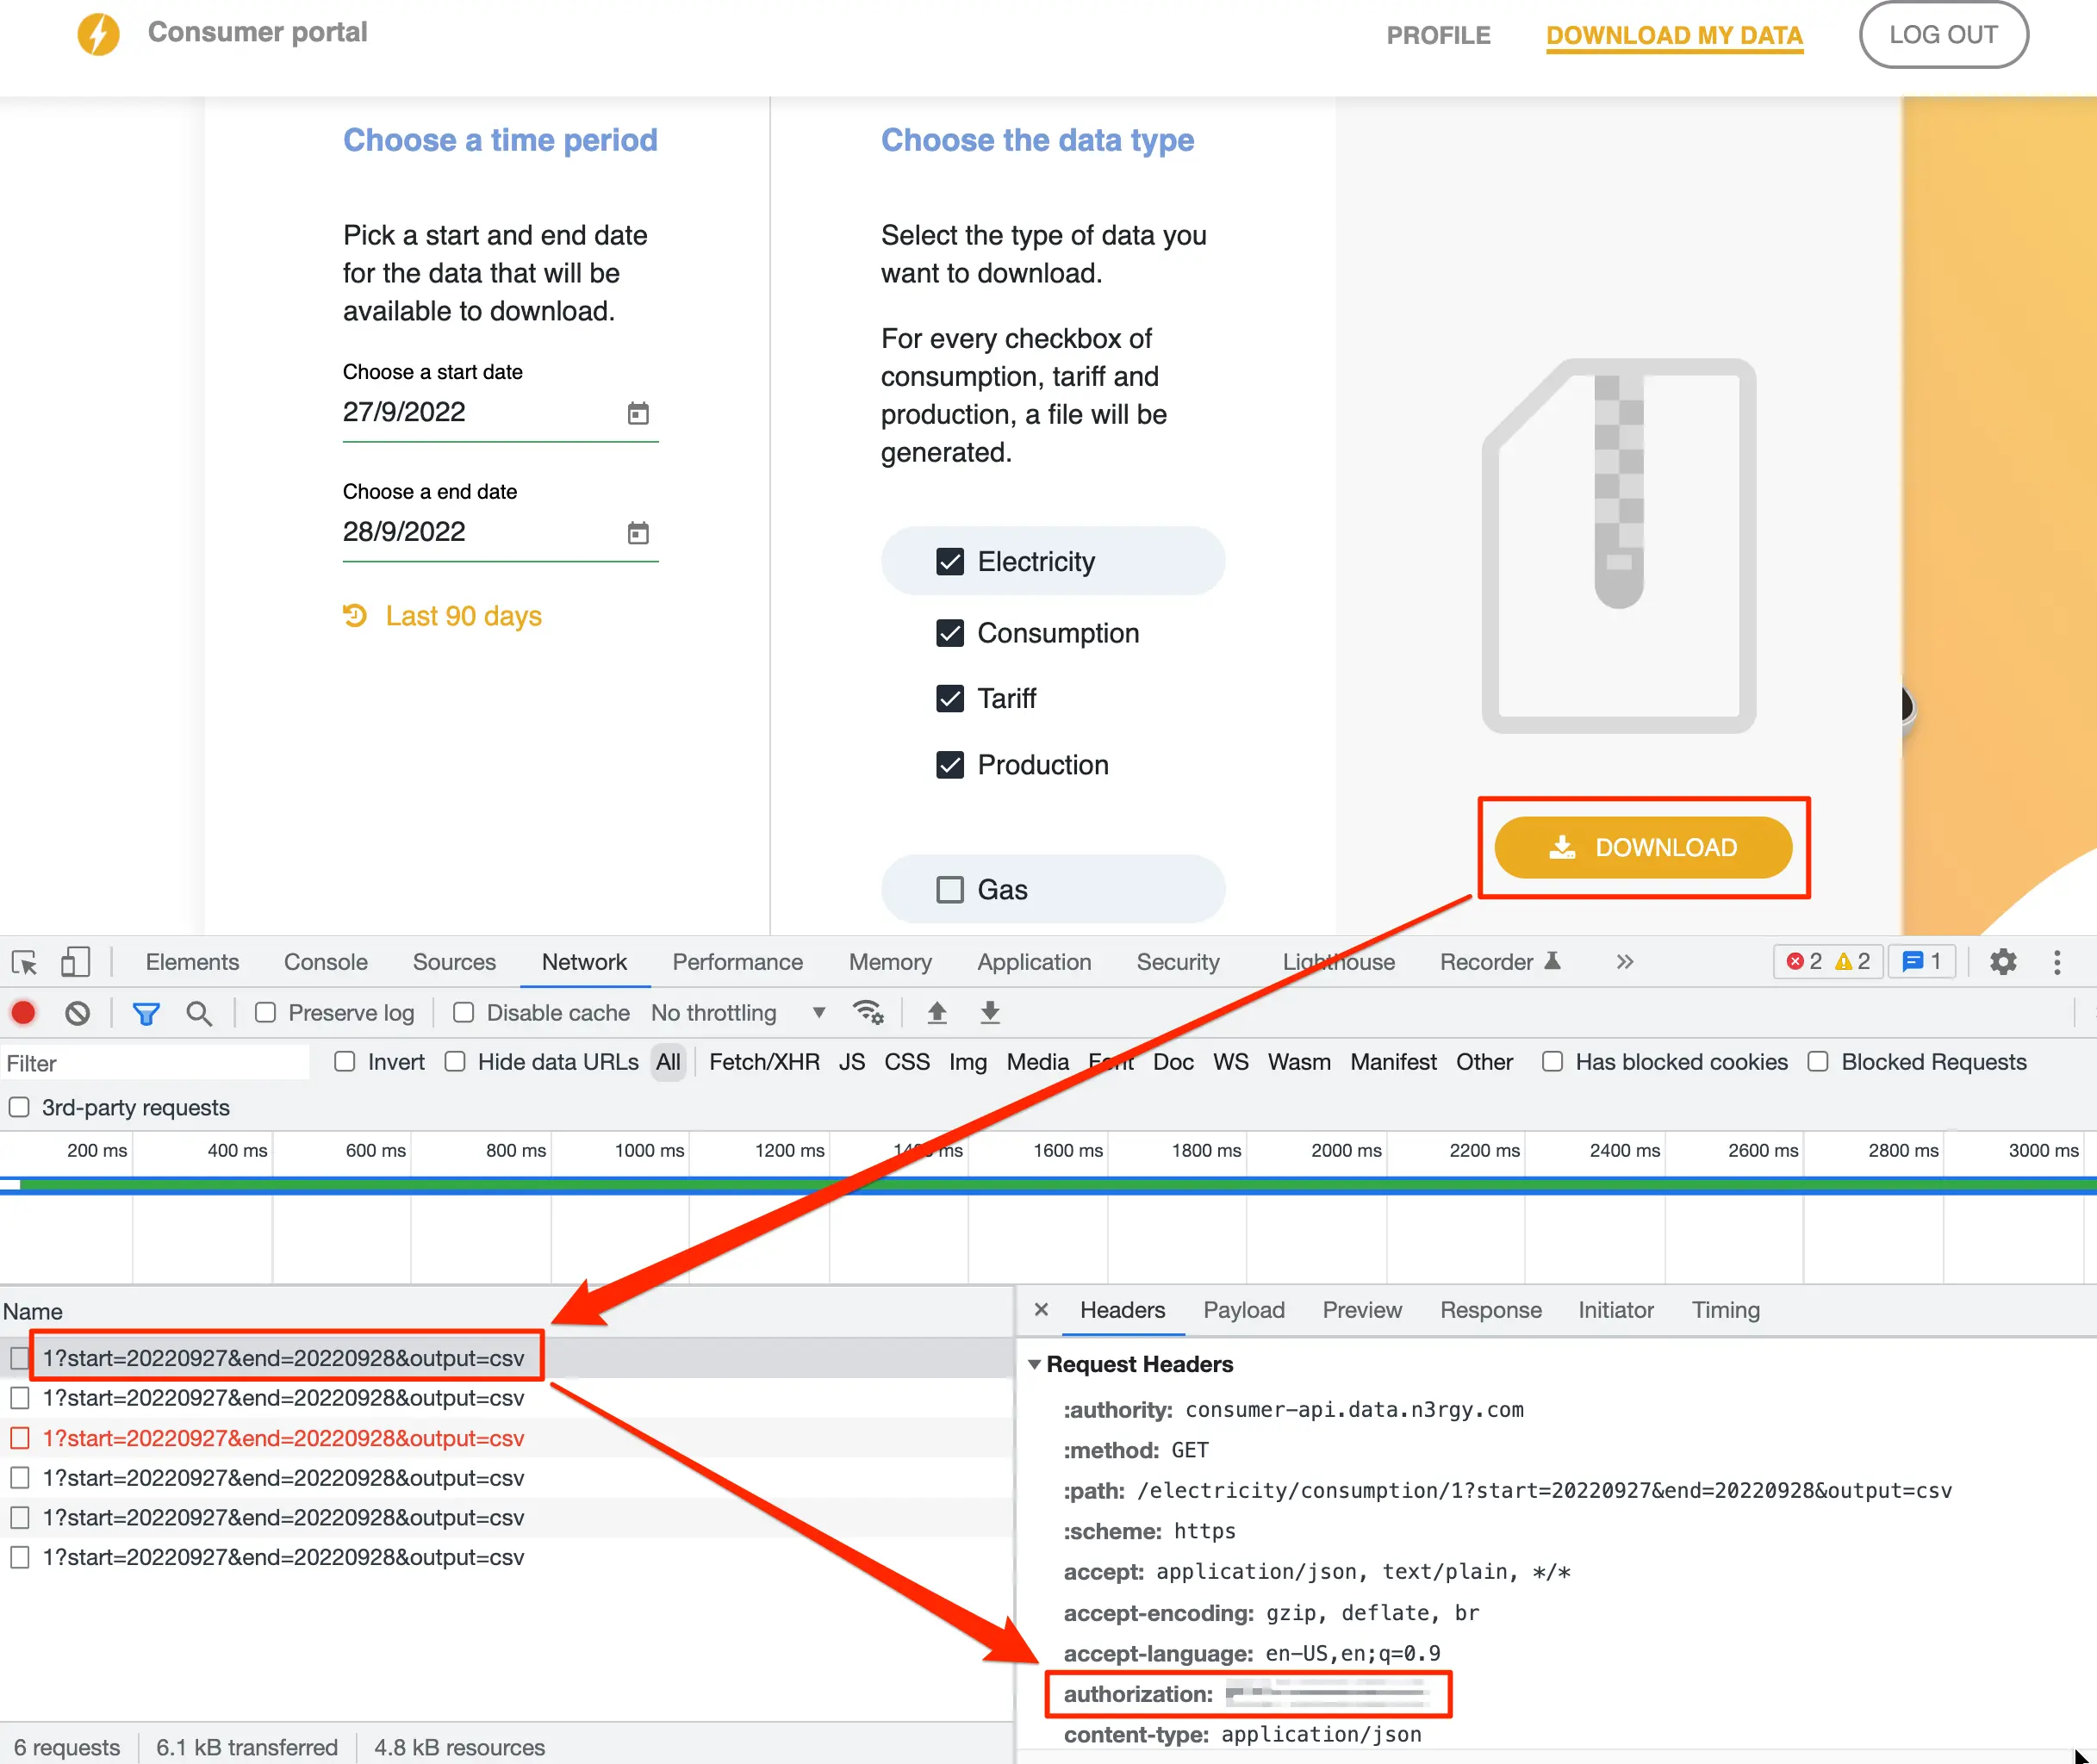
Find your IHD MAC address and note it down. This is usually on your smart meter device somewhere - this guide should help locate it. Go to the n3rgy Consumer Site and enter your MPxN number and IHD MAC address Once you're logged in, click on the 'Download My Data' link, open up Chrome Dev Tools, click the 'Download' link, and find the value of the authorization request header as shown below:
Next, enter your authorization header value as the value for auth_header at http://localhost:3000/admin/view-entity?id=1
Setting up Octopus Energy
As with many things on Octopus, setup is quite easy.
You will need your MPAN, Serial Number and API key, which can be found in your Octopus dashboard, then update the dummy credentials found in the Admin » Entities area.
